Things you'll need for this look:
Pair of barber scissors
Razor Comb
Hair bonding glue (any brand)
Hair Spray
Weave
Blow Dryer
Stocking Caps
And of course, a Mirror.
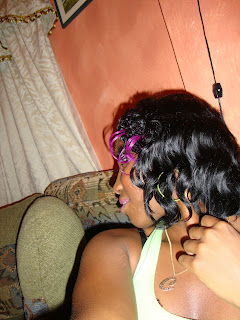
So recently, I've decided to play "brave" and weaved my entire head, it came out good for a first timer. Love the weave, the style, the look it gives me. I just totally love it. And I have decided to keep trying weaving to get better at it. Now this type of weaving is known as a "Quick weave", and I will tell you how i did it, so you can achieve that look as well. Quick weaves are very simple, basically as the hair is bonded on to a stocking cap (some women bond it directly to their hair, i wouldn't advise that) and not actually sewn in. So, you can do it for yourself, or you can have a friend do it for you. Now the 1st step would be to braid in your hair. My assumption was that leaving your hair out to make contact with the glue isn't the best idea. So braid in your hair, probably in a french braid. My hair is short, so i used tiny braids, i also parted a piece in front so that I can let my natural hair down. (this is optional to you) 2nd step is spritzing the hair and applying slight gel, just to keep your hair neat, and also to make the cap stick to your head, you will then blow dry your hair till its dry. When your finished doing that, you can apply the stocking/wig cap to your head. I used two. This way less glue gets to your hair. Next, proceed to spritz the stocking cap and blow dry until it's dried. After all of that, you get your weave. Take the weave and measure piece in the back, horizontally (from ear to ear), cut out the piece then apply the glue, blow dry a little bit, then stick to the cap, take the hair spritz, spray the track you just applied, then firmly press while you blow dry. This will allow for the track to "hold" better. Follow this same procedure, until you reach half way through your hair. Next you can bring the track all the way to the front at the sides, make sure you hold the tracks properly, as this step is a little difficult and you want the best fit. When you reach to the parted section, stop. Grab a pair of scissors and proceed to cut the stocking cap along the lines of the part. If you followed each procedure correctly, the cap would not move. After you finish cutting along the lines, you can style your hair according to the style of the weave, you can even add a little colored piece and shag it down, if you wanna be funky. That's what I did. There are many other ways to do a quick weave. This was my first attempt at it, so i didn't want to do anything that i was not comfortable doing, and you should to. The next quick weave I will try is the invisible part quick weave, and also an attempt at making a quick weave wig. So stay tuned for that. Check out my look below. I used French Twist from Milky Way, I used 1 and a half pack. Be sure you have enough weave, because if you don't, you can end up with an incomplete look. I know, i did that, LOL. Have fun experimenting girls.


No comments:
Post a Comment